
How to Create a Store on Shopify to Sell Your Creative Products
Throughout the years, we here at My Modern Met have seen the amazing and innovative ways in which creative entrepreneurs have grown their career. One way is by running their own online shop. It’s something that you can do, too.
If you’re producing great work—be it painting, jewellery, or photography—you should make it available to people across the world. By doing so, you’re creating opportunities for these folks to get to know and love your work firsthand, which can take your career in places that wouldn’t have been possible before. In the past, we’ve marvelled at makers who, from their own shop, have gone to collaborate with brands or had their artwork shown in galleries.
Once you’ve decided to make the investment and start your own online store, the next step is to select a platform. Like blogging, it can seem like you have endless options when it comes to eCommerce. So, what will you choose?
Shopify is one of the most popular eCommerce platforms for selling your creative goods. In fact, you may not have noticed but you’ve probably bought something from a store that uses it. And if you can’t tell that the store uses Shopify, then it’s doing its job! Shopify is meant to give online stores a stylish framework for selling their wares. Unlike other sites, Shopify isn’t a marketplace. You can’t go to their website and browse thousands of products. Rather, you go to the store’s unique URL and browse only their products—not their competitor’s wares.
There are other advantages to picking Shopify as your store platform. One big plus is its flexibility. Nearly every aspect of your shop can be tweaked to your liking. From the design to 3rd party apps that help you run your business, Shopify lets you customize things based on your needs.
Setting up your Shopify shop is an easy process, and you can do it in less than 15 minutes. We’ll show you how through these 5 steps.
- Sign up for Shopify.
- Get acquainted with the dashboard.
- Pick a theme for your shop.
- List your first product.
- Add 3rd party products to make your eCommerce a breeze.
Step 1: Sign up for Shopify.
If you’re still unsure about creating your online shop, that’s okay! Shopify gives you a 14-day free trial with no credit card required.

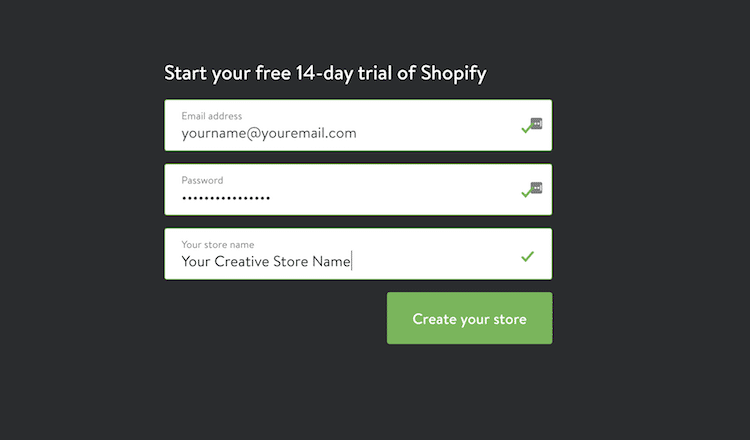
Start by filling out your email address, password, and store name. Then click “Create your store.”
It will take a moment, but then you’ll see this happy screen…
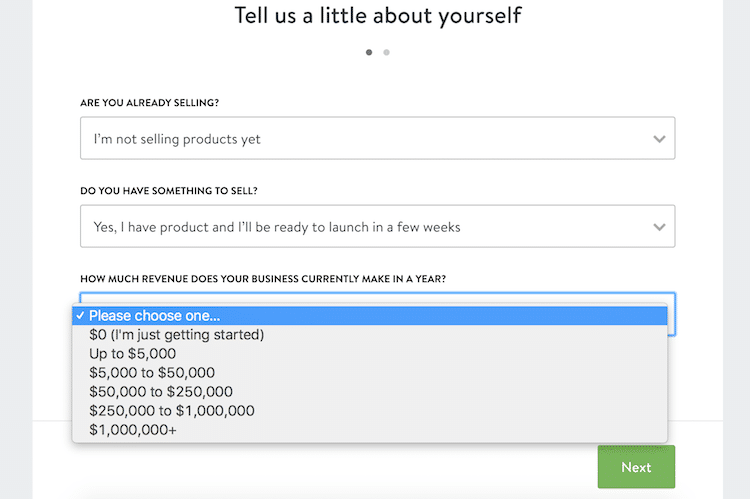
That screen will automatically take you to a form. There, you’ll fill out three questions that help Shopify get to know you. After you’re done, click “Next.”
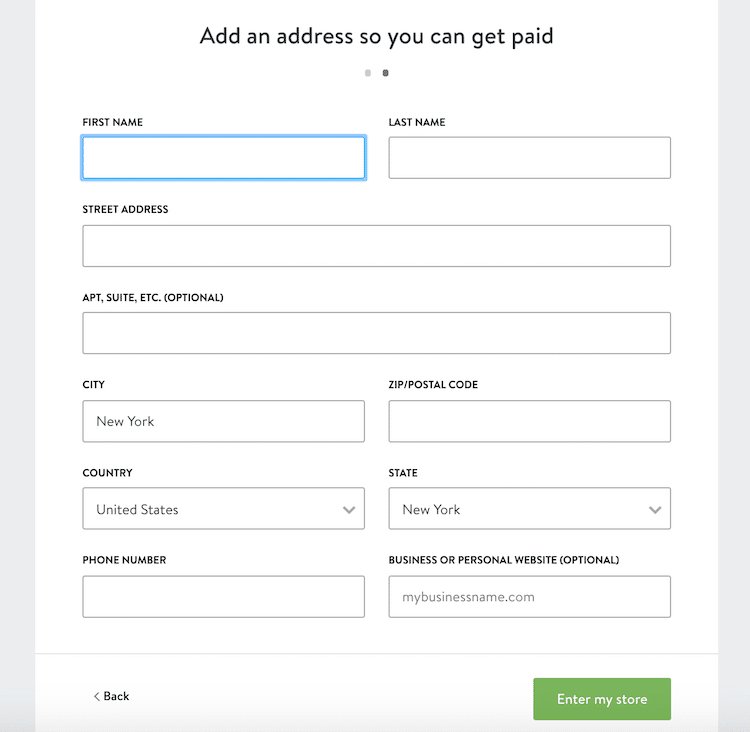
Now, add an address so you can get paid. Once you hit the green button “Enter my store,” it’ll take you to the Shopify dashboard.
Step 2: Learn the dashboard.
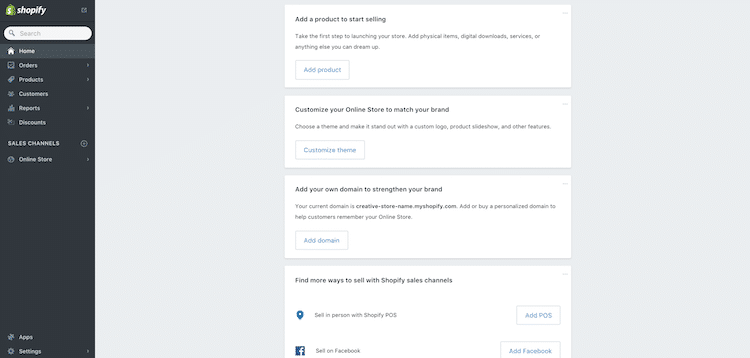
Like many online web interfaces, Shopify has a dashboard. This central location will be where you can view your orders, list products, offer promotional discounts, and more. Everything you’ll need to use is accessible on the left-hand side of the page under the green Shopify logo.
Step 3: Customize your shop with a theme.
One of the greatest things about Shopify is that it has a ton of themes to choose from—you can let your personality shine. That way, when people land on your website, they’ll instantly get a feel for who you are and what you’re selling.
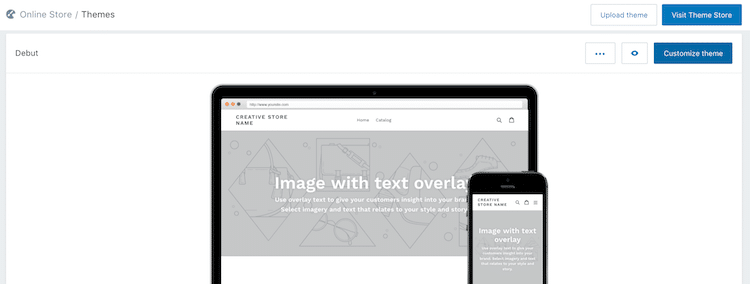
To begin customizing your page, click the “Customize” button on the dashboard. The default theme is called Debut, and it is a standard, clean layout. You have links at the top with a large image that spans across the screen. Products are located below. It’s also mobile responsive, meaning that it’ll look great on a laptop, tablet, or phone.
To start customizing this theme, click the “Customize theme” button at the top, right-hand side of the page.
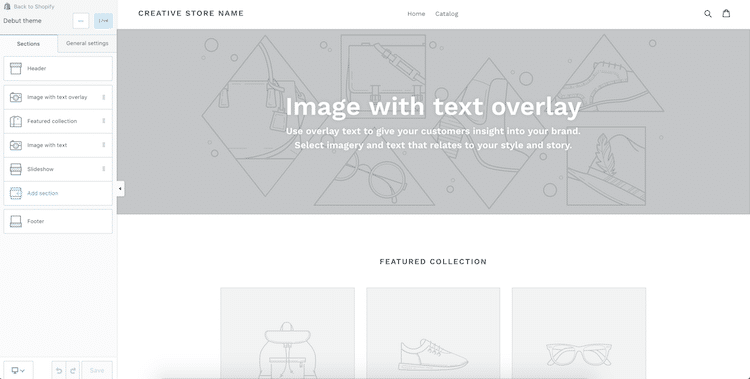
Customizing a storefront looks like this. Everything is very visual—no hard coding required. On the left-hand side of the screen, click on any one of the buttons to change things like the header, your featured products, and color schemes. You’ll be able to see how it looks on the right.
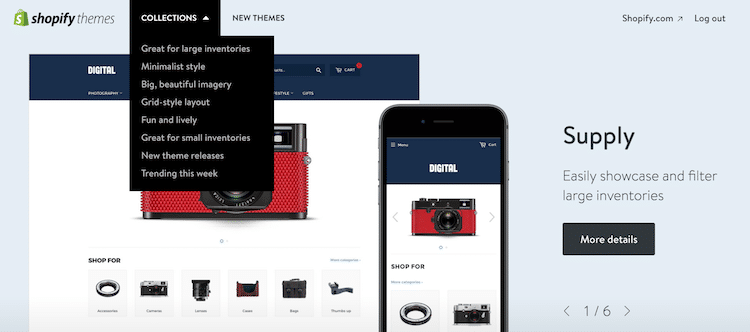
But maybe you don’t want the Debut theme. Don’t worry—Shopify has you covered! Visit their “Theme Store” to search for free or paid designs to fit exactly what you’re looking for. They’ve got a whole marketplace that’s organized around what a store owner would need. Maybe you’ve got a large inventory or need a grid-style layout. Shopify themes has them both.
Step 4: List your first product.
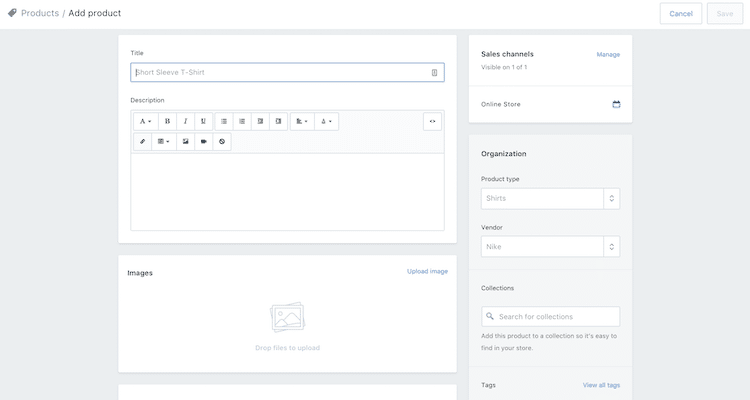
You’re never going to get any sales if you don’t list your first product. Luckily, it’s easy to do. Like the rest of Shopify, it’s very visual and user friendly. To get there from your dashboard, just click on “Products” on the left-hand side of the screen.
The online form has a place to title your product, add a description, and upload a photo. Depending on how you organize your inventory, you can select a product type and add it to a collection. By doing this, you’re making it easier for people to find on your website.
Step 5: Add 3rd party products to maximize your shop.
You can take your Shopify experience further by adding apps to your shop. Think about it like a plugin on WordPress—you can automate certain aspects of the store to help you save time and increase your sales.
To start using apps, click on the “Apps” button in your dashboard. It’s near the bottom of the screen on the left. Once you’re in, it’ll look like this:
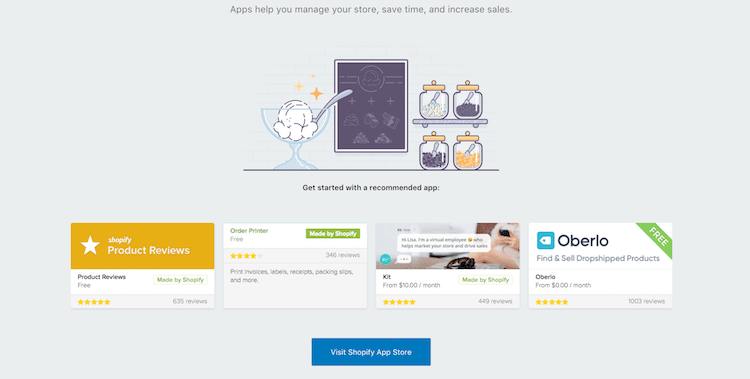
Shopify has its recommended apps, but that’s not all they offer. Clicking on the blue “Visit Shopify App Store” will take you into a separate window where you can explore all the different plugins to add to your store.
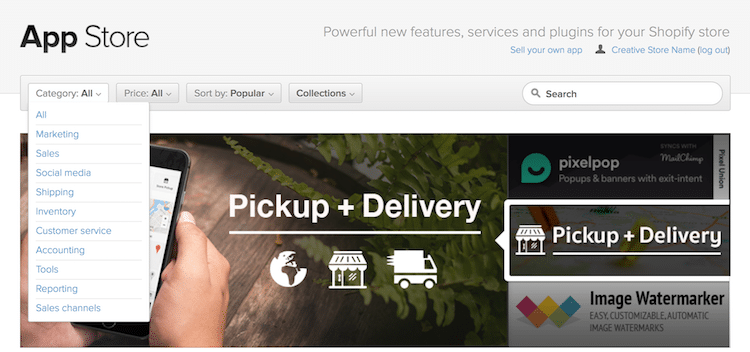
For shipping, one app we recommend is ShipStation. It automates the process of order fulfillment and prints shipping labels—so they’re ready to go in minutes. All you have to do is get your goods to your mail carrier. It currently has a 30-day free trial with a 5/5 satisfaction score from Shopify users.
Of course, the apps don’t stop there. And although the amount of choices can seem overwhelming, it doesn’t have to be. We recommend you start slow and build your shop bit by bit—you’ll know what kind of app and themes to look for as your business continues to grow.
For additional help navigating the waters of creating your own online store, Shopify has a frequently updated blog filled with tips—and that’s in addition to a resourceful list of guides. This includes 50 ways to make your first sale, how to market on Twitter, and a rundown of the growth benefits of email marketing. And the site has a growing list of success stories, too! Click here to see some firsthand accounts from those who have opened up their own Art & Photography stores through Shopify.
Now that you know how to create a store on Shopify, give it a try for free!
http://mymodernmet.com/how-to-create-a-store-on-shopify/
On – 02 May, 2017 By My Modern Met


